Aquí va lo que hemos hecho con la masa que os expliqué el otro día (click aquí para ver la masa). Inspiradas en el mismo video hicimos Cupcakes y Cámaras para poder tener unos bonitos collares. Pero tuvimos invitadas de ultima hora y a las más peques les dimos "tema libre". Salieron donuts, pizzas, quesos, pasteles, un erizo monisimo... Con mis armas de tia Li tenía un plan B para la miscelánea. Son ahora unos estupendos imanes de nevera.
Here it is the second part of my last weekly post. Inspired by the same video we made Cupcakes & Cameras to have nice necklaces. However, we had 2 little guests at the last minute. We gave them " free topic" with the dough. They made donuts, pizzas, cheese, cakes...With my weapons of Auntie Li I had a nice plan for them. Now they are wonderful magnets.
Paso a paso:
Step by step:
CUPCAKES:
 |
| Fig. 1 |
 |
| Fig. 2 |
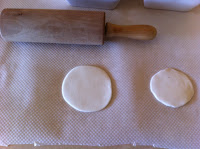
We form a round shape Fig 1. and with a pencil we can do the Fig 2. If we want we can mark little incisions on the side to simulate the incisions of the cupcake paper. On the top we do a snake shape and we rolled it. The final touch is the cherry. We can paste each part with water. If we want to make a necklace we make a hole. This dough remains elastic and if the hole isn't big enough we can always enlarge it. We painted one week later.
CÁMARAS:
Hacemos una plancha con la masa y recortamos dos rectángulos. Uno más grande que el otro. Lo pegamos con agua. Hacemos una redonda a continuación podemos dejar volar la imaginación. Objetivo, flash, botón de disparador...
We do a sheet with the dough and we cut 2 rectangles. One bigger than the other. We paste it with water, We add a circle. We can continue as far as our imagination let as do. With the lens, flash, shutter release button..
Cuando tenemos todos los objetos modelados los dejamos secar al sol.
Once we have finished with all the objects we let the objects dry under the sun or in the oven or near the heater.
Nosotras lo hemos pintado al cabo de una semana. Y esta es otra de las partes que me parecieron innovadoras al ver el video. Aúnque se puede hacer con pinturas lo hacen con pinta uñas. Para unas niñas de 11, 8 y 5 años esto es LO MÁS! Bueno y para mi también jejejeje. Hicimos recolecta de todos los que habían por casa y a por ello.
We painted one week later. And this is another of the more innovative parts of the video, Although it can be painted with standard paints she painted with nail polish. For some girls of 11, 8 and 5 years old that was the coolest thing ever! It was pretty cool for me as well! We collected all varnish we found at home and we started working.
Ejemplo del acabado: Pintamos cada parte por separado. Podemos hacer las cosas más precisas con un palillo. Y cuando este seco le ponemos la arandela para colgarlo como collar.
Example how the object can be finished: We painted each part separately. The final touches can be done with a toothpick. Once it is dry we can add the washer in case we are going to use it as a necklace.
Si queremos poner imán. Hay unas tiras de imán que por el otro lado tienen adhesivo. Se corta un trocito y se pega. Rápido y fácil.
If we want a magnet. There are magnet rolls that you can cut a piece and it is a magnet with one adhesive side. Easy and quick.


M'encanten!!! Maquíssim!!!
ReplyDeleteEsta vez te has salido!! Me encanta el post!
ReplyDeleteSiii,me encanta!!lo probaré!!:-))
ReplyDeleteCris
Super xulooooo. Me l'apunto fijo fijo fijo fijo fijo fijo!
ReplyDelete