Wednesday, June 26, 2013

*WHITE RECYCLED CANDLE HOLDER*


The Pantone Challenge había escogido blanco. El Blanco me parecía insípido, anodino, sin gracia. Hasta que me paré a pensar. Toda mi casa es blanca desde las cortinas a la mesa pasando por las puertas, las sillas, las paredes, los armarios y podría seguir. Porqué? Fue una decisión totalmente consiente. Me da paz, tranquilidad y luz. Cosas necesarias para estar bien en el hogar. Dicho así debería ser muy fácil hacer algo no? O sea que después del bloqueo inicial no tardé en encontrar un DIY blanco y veraniego adecuado para esta entrada de solsticio. Si es que algún día el verano decide quedarse porque este año no lo tenemos muy claro ;-). La idea esta inspirada en este blog.

I have chosen white for The Pantone Challenge.  White seemed tasteless, bland, unfunny. Until I stopped and I thought a little bit. My whole house is white from the curtains to the table through the doors, chairs, walls, cabinets and I could go on and on. Why? It was a totally conscious decision. It gives me peace, tranquillity and light. Needful things  to be confortable at home.  It seems it should be very easy to make something up? So, after the initial blocking, I  found a DIY in white suitable for the summer solstice,  if some day this year  summer  decides to stay  .... The idea is inspired by  this blog..
0) Materiales                                                                                                
-Latas vacías                                                                                                                                           -Empty cans
(en este caso las leches en polvo de Arlet)                                                                                                       (in this case Arlet’s milk powders)
-Pintura                                                                                                               -Painting
-Martillo                                                                                                              -Hammer
-Destornillador                                                                                                     -Screwdriver
-Alambre                                                                                                             -Wire

1) Una vez están las latas limpias las metemos en el congelador llenas de agua. Es la manera para poder hacer agujeros en la lata sin que se deforme. Un consejo, llenarlas hasta arriba del todo. Yo no lo hice y la lata se puede deformar más fácilmente.
1) Once the cans are clean place them in the freezer filled with water. It is the way to make holes in the can without deforming them. One tip, fill up untill the top. I did not do it and the can can be deformed more easily.

2) Marcamos dos agujeros en la parte superior para poder poner un asidero y también los puntos para el dibujo queremos en el centro.Una vez marcados los hacemos con el martillo y un destornillador o algo punzante.
2) We mark two holes in the top for a handle and mark with dots   the desired drawing in the center . Once the dots are marked use a hammer and a screwdriver or something sharp to make the holes.


3) Cuando este seco podemos empezar a pintar como más nos guste. En este caso hemos utilizado pintura pero también puede ser espray. Ah! Y en paralelo moldeamos un alambre un poco grueso para poder coger y colgar los porta velas dónde más nos gusten.
3) When is dried we can start painting. In this case we used paint but we  can also use spray. Ah! In parallel we mold a thick wire to make a handle to hang the candle cans.

4) Uno de los botes no lo hemos agujereado y lo hemos pintado para tener un jarrón reciclado. Finalmente lo hemos aderezado todo con un ramo de umbelíferas silvestres.
4)We haven’t drilled all the cans, because so we   have a recycled flower pot   . Finally we topped it all with a bouquet of wild Umbelliferae.

Todo preparado para las fiestas de Verano ahora sólo falta el calor!
Everything ready for our summer  parties,  we just need a hotter weather!!!


No olvidéis checkear los otros posts del reto: 
Don't forget to check the other blogs of the challenge:


Friday, May 31, 2013

*NAVY ANCHOR PADS*


Hace tiempo vi esta idea. Un día encontré 3 cojines en las rebajas y los guardé en el altillo. Ahí estaban los pobres nuestros de risa. Como otras muchas cosas que tengo en “pendientes”.  Navy blue me inspiraba  marinero, áncoras, estampación… Hacia tiempo que quería probar la técnica de estampación modelando tampones. Pero no me atrevía. Soy muy mala modelando, dibujando, cantando… En fin, una tiene que acéptalo!  Y qué mejor que invitar una amiga al reto? Se lo pedí a  Inês y ella me ayudó encantada. Me encargué de tener todo el material necesario. Primero fui a la tienda dónde hace tiempo descubrimos juntas  las pinturas para ropa y ahí compré las almohadillas para estampar. The Vostok  Printing shop. Después me fui a la Abacus a ver qué encontraba para darle un toque a los cojines y finalmente un poco de lana para las borlas. Aunque también terminamos haciendo un hilo marinero como habéis visto en la foto.

Some time ago I saw this idea. One day I found 3 cushions in the sales and I kept them in the attic. They have been there for so long…. Like many things that I have in "to do’s". Navy blue inspired me sailing, anchors, stamping ... It’s a long time since I wanted to try modeling an inkpad and enjoy this printing technique. But I did not dare, I am very bad modeling, drawing, singing ... Anyway, one has to accept it! And what better that inviting a friend to the challenge? I asked Inês and she helped me, delighted.I went to buy all the necessary material. First, I went to the store where we discovered together the paints for clothes and I bought stamp pads. The Vostok Printing shop. Then I went to the Abacus to find something  to give a touch to the cushions and finally a bit of wool for the tassels. But we also ended up making a sailor thread  as you have seen in the photo.


0)Material:


 1) Modelar un tampón: Va muy bien hacerlo con corcho, si sabes, es fácil. Después lo “mojamos “con la tinta y lo aplicamos 2 o 3 veces hasta conseguir la intensidad de color deseada. Para fijar bien la pintura al terminar tenemos que planchar la ropa.
1) To  model a stamp: it works very well with cork, if you know how to do it, it's easy. After dipping it in  ink,  apply it 2 or 3 times until getting the desired color intensity. To set the paint , we have to iron the cushions .


2) El hilo marinero lo hemos hecho con lana. Cogiendo hilo doble y haciéndolo girar sobre sí mismo. Terminándolo con un nudo marinero al final. Lo hemos cosido al cojín y después le hemos estampado las  ancoras.
2) We have done the sailor thread with wool. Taking double thread and turning on itself, and finishing it with a sailor knot . We've sewn it to the cushion and then we stamped the anchors.


3) Para el de líneas hemos empezado por los “pinceles” que compré en el Abacus pero las partes más oscuras las hemos terminado con una esponja de zapatos para darle más intensidad. También se tiene que planchar para fijar la pintura al final.
3) For the cushion with lines we  began with the brushes that I bought at the Abacus, but we paint  the darker parts with a sponge shoe to add intensity. You also have to iron to set the paint when you finish.


4) Los pompones son muy fáciles y resultones de hacer. Se recortan 2 circunferencias iguales de cartón con una circunferencia  vacía en el medio. Se atan con lana y se empieza a darle vueltas hasta que no queda agujero en el medio. Después se corta  justo por el medio entre los 2 cartones y finalmente se le ata un hilo por el sito dónde hemos cortado.
4) The pompoms are very easy and nice to do. Cut two equal cardboard circumferences  with an empty circumference in the middle. Tie them with wool and begin to pass the wool through the hole and around the cardboard until there is no hole in the middle. Then, cut right  in  between  the 2 cardboards and finally  tie a thread just  around the place  we’ve cut.


No olvidéis checkear los otros posts del reto: 
Don't forget to check the other blogs of the challenge:

Monday, May 6, 2013

*ASPIDISTRA*


Donde hay una aspidistra suele haber historia –Iglesia de San Ildefonso,Toledo-.

Where there is an aspidistra it must be history -Church of San Ildefonso, Toledo-.


Aspidistra Elatior 

Monday, April 29, 2013

*GRANDMA'S FRONT DOOR*


Jazmín, Jasmine, gessamí.

Hoy voy a maridar mis lunes de flores con un buen vino.
Today I am pairing my Monday of flowers with a good wine.

http://www.gramona.com/web/es/productos/vinos/gessami.html

Jasminum polyanthum

Wednesday, April 24, 2013

*THE ART OF YARN BOMBS*


Are the trees cold? Are they fashion conscious? Do they want to fit in with the colourful crowd on Melbourne’s busiest square? Yarn bombs like this one at Melbourne’s St Peters church, always make me stop and smile and wonder what it’s all about.

Yarn bombs are usually installed under the cover of darkness, so that when morning comes, passers-by can enjoy a colourful surprise. This installation featured a range of individual works, colourful patterns and stitches. The group responsible for these works is on facebook so if you're interested in knowing more about them check out their facebook site. Yarn bombing is now a popular worldwide movement, a type of street graffiti - the best part being that they can be easily removed without any damage whatsoever. So what’s it all about anyway? Well it's art, the beauty of it is we don’t need to understand it, just enjoy it.

                                                                                                                         Posted by Sara

-----------------------------------


Son fríos los árboles? ¿Son conscientes de la moda? ¿Quieren encajar con la multitud de colores en la plaza más concurrida de Melbourne? Bombas de hilo como esta en la iglesia de Melbourne St Peters, siempre me hacen parar, sonreír y preguntarme de que va todo esto.
Las bombas de hilo normalmente se instalan bajo el amparo de la oscuridad, para que cuando llegue la mañana, los transeúntes puedan disfrutar de su sorprendente colorido. La instalación cuenta con una serie de obras individuales, con patrones de colores y tipos de puntos distintos. Este grupo tiene una página de Facebook, si queréis saber más sobre ellos podéis echar un vistazo aquí.
Bombardeo del hilado es ahora un movimiento popular a nivel mundial, un tipo de pintada de la calle - la mejor parte es que se pueden eliminar fácilmente sin daño alguno. Entonces, ¿qué es todo esto? Bueno, es arte, la belleza está en que no necesitamos entenderlo, simplemente podemos disfrutarlo.

                                                                                                                         Posteado por Sara.


Friday, April 19, 2013

*CHEPU PATH SHELLS*


Me gusta tener  la egoísta sensación de haber estado en un sitio donde no va todo el mundo. En Chile este sitio fue  Sendero de Chepu. Nos hospedamos en Ancud y por una buena recomendación nos fuimos rumbo a Chepu. De ahí debíamos contactar con un hombre que nos cruzaba el río  y hacer un precioso sendero que bordeaba el mar hasta las pingüineras. No todo fue exactamente así y el primer día llovió tanto que no pudimos emprender el camino. Aunque vimos que era un lugar prometedor y nos organizamos para hacerlo antes de irnos de la Isla grande de Chiloé. Tampoco vimos pingüinos, bueno en realidad sí, un pobre pingüino muerto. Pero las vistas, la visita inesperado de una pareja de lobos de mar y vacas comiendo algas en la playa superaron con creces todas mis expectativas. De ahí me llevé estas conchas. Que cada mañana me dicen: - Hola Lídia! Y me recuerdan que hay sitios maravillosos en los que me gustaría seguir perdiéndome.

I like having the selfish feeling of being in a place still untouched by people. In my trips I keep  these sites in my memory as my little treasures. During my trip in Chile this place was called  Chepu path. We stayed in Ancud and thanks to a good recommendation we went towards Chepu. From there, we were supposed to contact a man who had  to make us cross  the river and walk  a marvellous path along the sea until the penguin breeding ground penguin breeding ground. Not everything was exactly like that and the first day it rained so much that  we could not get on the road. In spite of the weather,  we saw it was a promising place and we managed to visited it before leaving from  Chiloé main island. We didn’t see penguins, well actually  a poor dead penguin. But the view, the unexpected visit of a couple of sea lions and cows eating seaweed on the beach, far exceeded all my expectations. From there I took these shells. Every morning they say to me: - Hola Lidia! And they remind me that  there are still wonderful places where I  would like to keep getting lost.

Monday, April 15, 2013

*TRIBUTE TO GREEN PLANTS*


Las innumerables  flores ya han empezado con sus explosiones de color. Todos los campos están llenos y también los árboles frutales. Pero en esta ocasión he querido rendir un pequeño homenaje a las plantas verdes. Porque son ellas las que nos acompañan durante todo el año. Nos dan vida, nos dan luz e ilusión para seguir adelante en los duro inviernos y nos guían hasta la dulce primavera.

The countless flowers have already started with explosions of color. All fields are full of them and fruit trees too. But this time I wanted to pay a tribute to green plants. Because they are the ones that are with us during all the year. They give us life, light and hope to move forward in the harsh winters and guide us until the sweet spring.


Para darle un toque más verde si se puede hemos decorado algunas macetas. Mientras las estábamos pintando se nos ha ocurrido una manera de darles un  acabado al estilo “bayeta” . Muy rápido y resultón!

To give it a greener color,if  it's possible, we  have decorated some pots with watercolors and at the last minute we have foamed over another shade of green.  A “wipe” style finish. Easy, quick and good looking!


Para acabar este post me gustaría dejaros algunos de las nombres de las plantas.  Para mi cada planta tiene su historia. Pero muchas veces no sabemos ponerle nombre a las "hojas verdes". Tenemos aspidistras Aspidistra Elatior que son estas hojas anchas que nos remiten a las abuelas. También el típico Potus Scindapsus aureus y la yedra hereda hélix. Y dos plantas del género de los  Plectranthus que son las que podemos ver a cada lado del teléfono.

To end this post I would like to leave you some names of these plants. For me each plant have an history. But often we do not know the name of  the "greens leaves". We can see aspidistras Aspidistra Elatior those broadleaf that remind us our  grandmothers. We also have the typical Potus Scindapsus aureus and commom ivy hereda hélix. And two plants from  Plectranthus  genre that we can see on each side of the phone.


Como siempre no olvidéis checkear los otros blogs del reto  Verde Pantone Challenge:
Don't forget to check the other Blogs for The Green Pantone Challenge:

*Choc-chef

*Aquifistreamos

Thursday, April 11, 2013

*ANTI STRESS BREAD*


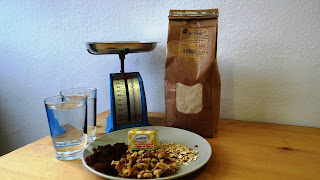
Desde que Laia volvió de su estancia en Copenhaguen a veces hace pan, especialmente si vuelve un día estresada del trabajo y quiere relajarse. Me contó que allí era muy común hacerlo en casa. Te mantiene la cabeza ocupada y también las manos. Se tiene que hacer sin prisas pero con muchas pausas. Y a mí me picó la curiosidad. Se planteaba un fin de semana tranquilo y lluvioso perfecto para estar en casa y hacer pan. O sea que me enseñó y aquí tenemos el resultado. Está bien saber que aún somos capaces de poder hacer estas cosas sin ningún gadget de cocina especial. Simplemente como el que hacían nuestras abuelas. Nos quedó buenísimo y quiero repetirlo pronto.

Ingredientes:

500 g de harina de fuerza. En nuestro caso hemos utilizado harina “púrpura”
10 g levadura fresca
10 g sal
350 g de agua
Frutos secos (opcional)


Elaboración:

1) Mezclamos la levadura con la harina. Añadimos la sal y vamos añadiendo el agua poco a poco con una mano mientras mezclamos con la otra mano.

2)  Amasar: La masa se encuentra en un estado inicial, o sea muy pegajosa,  pero la ponemos ya en el mármol y empezamos a amasar. Aquí es dónde está la clave del éxito. Tenemos que estirar la masa para que coja aire. La estiramos por encima y le damos la vuelta sobre sí misma. La extendemos, la apretamos, la giramos… Y así hasta conseguir una masa elástica, compacta y homogénea. Los libros dicen que se tarda unos 20 minutos. Nosotras hemos tardado una hora. Al final de este paso es dónde se añaden los frutos secos queremos ponerlos.


3)Doblar: Después de pastar la masa la tenemos que convertir en una bola. Aquí si ponemos harina en el mármol y hacemos una bola con la masa ya elástica. Tenemos que estirar los extremos y llevarlos al centro presionando las puntas con el dedo gordo. Así hasta conseguir una bola procurando que las puntas queden siempre debajo.

4)Una vez tenemos hecha la bola. La dejamos reposar en un bol tapada con un paño de cocina 1 hora. Tiene que doblar su volumen aproximadamente.


5)Modelar: Volvemos a enharinar un poco el mármol. Hacemos 2 bolas  y dejamos en reposo la masa 5 minutos.  Ahora modelamos cada bola para conseguir una barrita. Apretamos con la palma de la mano y llevamos los extremos al centro, apretamos y lo unimos.  Conseguimos finalmente una forma de barra alargada y dejamos la masa encima  y cubierta de un paño 1 hora.

6)Ponemos las barritas crudas en una fuente de horno un poco enharinada . Hacemos los cortes por encima con una hoja de afeitar o cuchillo afilado. Justo antes de entrar en el horno.(precalentado a  220 ºC) espolvoreamos un poco de agua. Esta agua nos ayuda a conseguir una buena corteza. Tarda unos 20 min.


Si sumas todos los tiempos: 5’+60’+5’+60’+5’+5’60’+20’. Asegúrate de tener 4 horas antes de empezar a hacer pan. Durante estas 4 horas vas a tener 2 horas de espera para poder hacer otras cosas en paralelo.


Tuesday, April 2, 2013

*EASTER POP CAKES*


Después de nuestro intento fallido de POP cakes siguiendo las instrucciones de aquifistreamos. Pensé  que lo mejor sería que nos diera clase toda una profesional :-) . Un curso de Pop cakes en MY LOVELY FOOD, me pareció un regalo perfecto para mi ahijada en estos días de Pascua. Ella salió encantada y le he prometido repetir. El curso era para niños pero como el fondant se parece tanto a la plastilina la verdad es que las peques lo hacían bastante mejor que yo. Ingrid, la profesora, super simpática y con mucha paciencia. Aquí van 5 pasos rápidos de lo que hicimos. Para saber más tenéis que ir al curso!

After our failed attempt of POP cakes following aquifistreamos´ instructions. I thought  that it was better to receive a professional class :-) . I found out  a course of pop cakes in MY LOVELY FOOD, and I guessed it was a perfect gift for my goddaughter this Easter. She was delighted and I promised her to repeat.The course was for children and as fondant is so like plasticine, the truth is that they did it better than me. Ingrid, the theacher, was super friendly and very patient. Here are five quick steps of what we did, to know more you have to go to the course!


1) Primero se desmenuza cualquier bizcocho que tengamos por casa.
   First we crumbled a cake.

2) Se hacen las bolitas añadiendo al bizcocho butter cream o chocolate o philadelphia...
   We did balls with the cake by adding the butter cream or chocolate or philadelphia...

3) Se envuelven la bolas con una capa de fondant.
    We wrapped the balls with a layer of fondant.

4) Se va decorando según el animal/muñeco deseado y se van pegando las piecitas con
    pegamento de azúcar. Más a bajo se puede ver el ejemplo del pollito.
    It was decorated according to the animal/doll  desired and we added each piece with edible glue. 
    Below you can see  the chick example.

5) Finalmente añadimos el palo con este pegamento o chocolate y se deja secar antes de ponerlo en vertical.
    Finally, we put he stick adding sugar glue or chocolate and we let it  dry  before putting it upright.


Pollito Pop Cakes- Chick Pop cakes


Wednesday, March 20, 2013

*NEON PINK SHELVES *


Oí la palabra rosa para este Pantone Challenge y sabía por dónde tirar. Tenía una asignatura pendiente. Hace un par de años cuando me mudé a mi apartamento había un viejo espejo de plástico azul que quería pintar rosa flúor pero me quedo marrón :-(.  Una cosa tenía clara, esta vez lo iba  a conseguir!Tardé más de lo esperado en encontrar un objeto el cuál poder esprayar a gusto. Un mueble me parecía poco acertado y no tenía otro espejo disponible.  Cuando vi estas bobinas de cartón duro pensé que estaría muy bien reciclarlas. Me las llevé y  manos a la obra...

When I listened to the word pink for  this Pantone  Challenge I knew where to shoot. I had a pending issue. A couple of years ago when I moved into my apartment I had an old blue plastic mirror which I wanted to paint  neon pink but I end up with a brownish one  :-(. One thing was clear to me, this time I was going to get it!It took longer than expected to find a suitable object to spray. I thought that a furniture was unwise  and I had no other mirror available. When I saw these cardboard reels I thought that recycling them it would be a good idea. I took them and get to work ...


1) Primero lo pinté de blanco para obtener una base neutra dónde aplicar el rosa.
1) Firstly, I painted them inwhite to have a neutral base to apply the pink.

2) Cubrí la zona interior con cinta adhesiva protectora para mantener la parte interior blanca. No nos engañemos todo rosa flúor es un poco demasiado para ponerlo en casa.
2) Secodly, I covered the inside area to keep it white with masking tape. I think that the entire reel neon pink is a bit too much to put it at home.

3) Una vez seca la parte blanca. Pinte la parte exterior de rosa.
3) Once the white part was dry. I painted the outside in pink.


Mi idea era hacer unas bonitas estanterías. Pero dónde ponerlas? Y a mi hermana le gusto tanto la idea que han quedado adjudicadas para la habitación de mi sobrina Arlet!
Consejos Prácticos: Pintar con espray puede ser a veces bastante más caro que con pintura. La verdad es que gasté 3 botes de blanco. Pero el rosa me ha durado para todas las bobinas y aún me sobra. El mecanismo es distinto y se reparte mucho mejor. Recomiendo esta marca que no conocía y me ha funcionado muy bien.

My idea was to make some nice shelves. But where to put them? My sister liked the idea so much that she has used them to decorated my niece´s room.
Tips: Painting with spray can sometimes be far more expensive than standard paint. The truth is that I spent quite a lot of money - three white sprays-. But pink has lasted me for all coils and even spare me. The mechanism is different and the paint is distributed much better. I recommend this brand that I did not know and it has worked very well.


No olvideís checkear el Pantone Challenge Rosa de:
Don't forget to check the other Blogs for The Pink Pantone Challenge:

*Aquifistreamos

*Salud a la Carta

*Choc-chef

Monday, March 18, 2013

*TORTAS FRITAS*


Es lunes,  a falta de flores buenas son tortas. La verdad es que este post lo escribí hace tiempo pero por una razón u  otra nunca fue publicado. Y pienso que hoy es un buen día porque está a punto de volver de visita :

A ella le gusta cocinar, a nosotros no. Pero como hace tiempo que no viene de visita la invitamos a casa y cocinamos. Como hemos mejorado desde que se fue!  Pero como no podría ser de otra manera nos cocina un postre de la tierra dónde el amor la tiene presa. Esta es la razón por la cual comimos Tortas fritas en Barcelona el otro día después de cenar. Son como Pestiños pero menos fritos. Estaban realmente muy buenos.


Ingredientes:


Una taza de zumo de naranja
Una taza de aceite de freír
Una taza de vino blanco
Un "puñao" de semillas de matalauva
Harina
Miel

Preparación: Primero se fríen las semillas de matalauva con una taza de aceite. Y se deja enfriar. Después mezclamos todos los líquidos en frío. A continuación vamos añadiendo harina hasta que no quede pegajoso. Lo envolvemos en papel transparente y lo dejamos en reposo unas 2 horas. Después del reposo lo estiramos, lo cortamos, lo freímos y le ponemos miel.


----------------------------------------------------------------------


It's Monday and in  the absence of flowers,  cakes are a good option. The truth is that I wrote this post time ago but for one reason or another was never published. And I think that today is a good day because she is about to visit us again:

She used to cook for us before she left for love to live abroad. The other day she was visiting us and we invite her over. We occasionally cooked for her but she did for us a dessert called "Tortas fritas" typical from the place where she is currently trapped by love. This is the reason why we ate Tortas Fritas in Barcelona the other day. It is like "pestiños" but less fried. They were really yummy.


Ingredients:


1c of Orange juice
1c of Vegetable oil
1c of White wine
A handfull of anise seeds
Flour
Honey


Preparation: Firstly we fry anise seeds with a cup of vegetable oil. We let it cool. Afterwards, we mix all the liquids. We continue adding the flour. We add flour till the mix it is not sticky anymore. We wrap the dough with a transparent paper and we let it rest about 2 hours. After the resting time  we stretch the dough, we cut it, we  fried and we add honey at it. 


Monday, March 4, 2013

*LILIUM*


Aunque haya tenido un retorno de vacaciones muy duro no me da la gana de acabar el día sin postear el MONDAYS&FLOWERS que tenía pensado para hoy.  La flor elegida es el Lilium. Me gustan todas sus variedades, colores y el olor que desprenden. Me pareció una buena invitación para entrar en este bar Chileno el cual servían café Vietnamita! Ay que rico el cà phê sữa đá
 -----------------------------------------------------
Although I have had a very hard holiday return I didn’t want to end up my day without posting the MONDAYS & FLOWERS that I had in my mind for today. The Lilium is the chosen flower. I like all types, colors and their smell. I found that it was good invitation card to enter to this Chilean bar where they served Vietnamese coffee! Oh that yummy Ca Phe Sua.

Saturday, February 23, 2013

*RECYCLED WINDOW AS A BOOKSHELF*

Como ya sabéis me gusta mucho la gente que recicla materiales y les encuentra una nueva funcionalidad. Paseando por los hostales de Chile podría decir que en cada uno que he estado hasta el momento he encontrado en él una pequeña joya. Este de Chiloé dónde hemos aterrizado esta mañana esta todo hecho de materiales reciclados. Me parece muy bonito y cojo la idea al vuelo para un futuro como siempre.

http://www.palafitosur.com/

-----------------------------------
As you know I love the people who recyecle and find out  ew functionalities for existing materials. Strolling hostels in Chile I could say that everyone I've been so far I've found it a little gem.This one I am currently staying in Chiloé  where we have landed this morning is all made ​​from recycled materials. It seems very nice and I will keep this  idea in my mind for the future as always.
 
http://www.palafitosur.com/


Monday, February 18, 2013

*UGANDA IS BROWN*


Tenía pensado publicar otro tipo de post. Algo hecho por mí como es habitual en el Pantone Challenge. Pero aprovechando que estoy de viaje esta foto tomada durante mi viaje a Uganda  en 2011 creo que es muy adecuada. Así puedo hablar de mi gran pasión, viajar. Lo que me apasiona de ello es ver diferentes maneras de funcionar. O que a miles de kilómetros, en esencia, funcionan igual que nosotros. Disfrutar de diferentes paisajes, diferentes animales. Pero en realidad  lo que me gusta es que me sorprendan. Lo inesperado. 

Uganda es marrón es una forma de plasmar en esta foto mi Pantone de este mes. No es que el país sea principalmente marrón. Es muy verde y también rojo  pero las gentes sí son Marrones. Aunque no sé porque siempre se han llamado negros.


En fin, estos meses de invierno nos sirven a los viajeros para pensar en el viaje del próximo verano. Si queréis ir a un país africano precioso, poco explotado y con gente muy amable os recomiendo Uganda. Creo que en unos pocos años se volverá muy turístico y los niños empezarán a ver a los turistas como dólares con patas. Pero de momento es un país donde puedes ir tranquilamente y hablar de tú a tú con la gente.


Desembarcamos en Entebbe dónde hay el aeropuerto y los pocos ricos del lugar. Nos dirigimos a la capital, Kampala. La ciudad nos retuvo más de lo esperado por la lentitud burocrática del “papeleo” oficial para los permisos de los Gorilas. Allí nos vinieron a buscar Laura y sus amigos. Una chica que contactamos dos semanas antes de llegar. Amiga de amigos estaba realizando un voluntariado en un pueblo cerca de Jinja y nos permitió darle otra dimensión a nuestro viaje. Jinja es una pequeña ciudad con algunas casas coloniales que para ser africana podríamos decir que tiene encanto. De allí nos fuimos de fin de semana a las Sipi falls. Preciosas y poco explotadas cascadas cerca de Kenia. Volvimos a Jinja para dirijirnos al poblado dónde Laura estaba de voluntaria. Tres días en un pueblecito africano con sus gentes. Casi empezamos a chapurrer el lugandés. Continuamos para el parque natural de Murshinson falls para realizar un Safari y después nos dirigimos a Fort Portal. Lugar dónde hay muchos lagos volcánicos y plantaciones de té que dejaron los ingleses. Después de descansar un poco de nuestro ajetreo fuimos al Bwindi Imprentrable Forest en Ruhija a ver a los Gorilas. Continuamos por el Bunyonyi Lake el único lago Ugandés dónde se permite el baño porque no está parasitado. Terminamos en las Ssess Islans del lago Victoria.


Tengo mil historias pero no me extenderé más, cada sitio que menciono fue especial, os dejo  la ruta para daros ideas y también un blog que me inspiré para hacer mi viaje. Ya que hay muy poca información para organizar los itinerarios.  Ya sabéis que me podéis contactar por e-mail si tenéis preguntas.


http://ontravelling.wordpress.com/recorridos/

Después del rollo que os he pegado... sobretodo no olvideís checkear el Pantone Challenge Marrón de:


Aquifistreamos

*Salud a la Carta

*Choc-chef

--------------------------------------------------
I planned to publish another post. Something made for me as usual in the Pantone Challenge. However, I thought that as I am abroad right now, this photo taken during my trip to Uganda in 2011, it would be very appropriate. In this way I can talk about my passion, traveling.What I love about it is to see different ways of working. Or that at thousands of miles, in essence, people work just like us. I enjoy seeing different landscapes, different animals. But what I really like is to be surprised by something unexpected.

Uganda is brown is a way to capture in this photo my Pantone of this month. I don’t mean that the country is mainly brown. It's green and red but the people themselves are brown. I do not know why they have always been called black.


 In short, these winter months are used for travelers to think about next summer's trip. If you want to go to a beautiful African country, largely untapped and with very friendly people I highly recommend Uganda. I think in a few years will become very touristy and children will begin to see tourists as dollars with legs. But for now it is a country where you can go and talk calmly and speak face to face with people.


We landed at Entebbe where there is the main airport and where they live the few rich Ugandans. We headed to the capital, Kampala. The city has retained us more than expected for the red tape of "paperwork" for the official Gorilla permits. Then Laura and her friends came to pick us up. Laura is a girl that we contacted two weeks before we were leaving to Uganda. Laura was working as a volunteer in a village near Jinja. That allowed us giving another dimension to our trip. Jinja is a small town with some colonial houses. To be an African city I would say that it was charmy. From there we spend the weekend at Sipi Falls. Beautiful and little exploited waterfalls near Kenya. We returned to Jinja and we headed to the village where Laura was volunteering. Three days in an African village with nothing else but their people. We almost started pattering Luganda. We continued to the natural park of Murshinson falls for a Safari and then headed to Fort Portal. Place where there are many volcanic lakes and tea plantations left by the British. We did a break to breathe a little bit and we continued to Impenetrable Bwindi Forest in Ruhija to see the Gorillas. We continued along the Lake Bunyonyi the only Ugandan lake where swimming is permitted because is parasides free. We ended up at  Lake Victoria Ssess Islands


I have thousands of stories but I will not expand further, each site I have mentioned was special, I leave the route to give you ideas and also a blog that I was inspired to make my trip. There is little information to build routes. You can contact me by e-mail if you have any question. 


http://ontravelling.wordpress.com/recorridos/
After all my story telling please do not forget to check the other Blogs for The Brown Pantone Challenge:

* Aquifistreamos

*Salud a la Carta

*Choc-chef


Tuesday, February 12, 2013

*BAKER'S TWINE NECKALCE*


Ya os conté que había hecho más cositas con Baker's twine. Este collar es un ejemplo. He hecho algunos más pero ya los he regalado. Siempre me gusta combinar diferentes materiales: metal, hueso, conchas... Creo que en verano tendrán mucho más juego...Pero no pude esperar :-)
--------------------------------------
As I told you that I had done more things with Baker's twine. This necklace is an example. I made some more but I have already given them. I always like to combine different materials: metal, bone, shells ... I think that in summer baker's twine will suits more.  But I couldn't wait :-)